How to Make Hard Cider

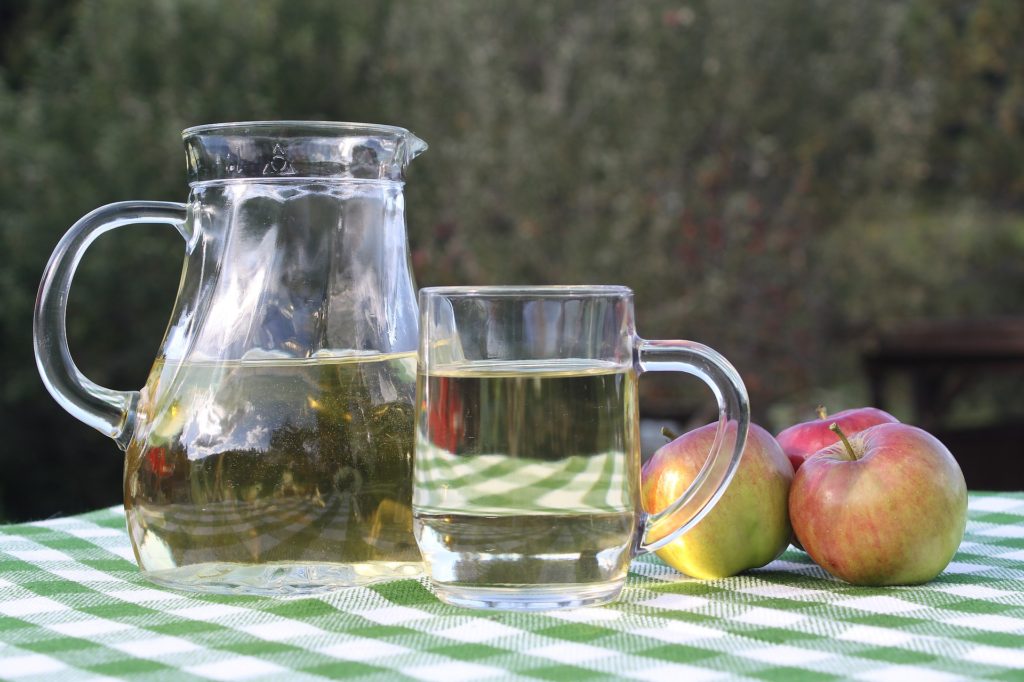
Simply put, you make hard cider by adding yeast to apple cider under sanitized conditions, until the yeast converts the sugars into alcohol.
It’s simple to understand the basics but you’ll need some information to be able to get the most from your cider making experience.
What is this Guide?
This guide explains the process of how to make hard cider in simple terms that everyone can understand. It gives enough detail to help a first-timer successfully make their first batch of cider, when used with the recipes.
It also goes into enough detail and provides enough references to help experienced cidermakers fully understand the process so they can make their next batch better.
What’s Included in the Guide?
This guide explains the process of making hard cider and includes:

1. Introduction and High-Level Overview
 As mentioned above, the basic process of making hard cider is simple and straightforward.
To start, combine apple juice with yeast in a container to start a process called fermentation. During fermentation, the yeast converts the sugar in the juice into alcohol and gas. Most likely, you’ll seal the container with a device called an ‘air lock’ (or bubbler) to allow the gas to escape, without letting any air or contaminants in.
Once the fermentation process is complete (in about 1-3 weeks), you have hard cider. Typically, you move the cider into another container for secondary fermentation where it ages and can be combined with additional flavor components, such as fruit or spices.
After secondary fermentation, you can make adjustments for sweetness, carbonation, and flavor. Next, you rack the hard cider into bottles, where it continues to age. Finally, you drink! 🙂
2. Gather and Prepare Ingredients
The ingredients you need to make hard cider will depend on the specific recipe you are following. It is possible to include quite a few ingredients in a batch, but you only really need apple juice and yeast. As you progress in your cidermaking, you’ll likely want to start incorporating some more optional and advanced ingredients.
First Required Ingredient: Apple Cider or Juice
Sometimes referred to as ‘raw’ or ‘soft’ cider, non-alcoholic juice or cider is the first of the main ingredients (more information on the difference between apple juice and apple cider).
If you are pressing your own apple cider, it is best to use a blend of different apple varieties, some with high sugar levels, and others to give acids and tannins. Check out this page for a good overview of the blend of sharps, sweets, and sharp-sweets varieties.
If you plan on buying the apple juice, you should understand that differences in juices and ciders. Check out my comprehensive guide which looks at many characteristics of the juice to help you select the best one.
Second Required Ingredient: Yeast
The yeast’s primary role is to convert sugar to alcohol, but it also influences the flavors and body of the final product. Being such a critical component, there is lots of discussion in the cidermaking circles around which yeasts are best, and how to properly use each one.
You will want to use a brewer’s yeast (NOT a bread yeast). Most strains of yeast used for wine making make good choices for making cider, and there are even cider-specific yeast strains available. Check out my reviews and recommendations for hard cider yeasts for much more information.
Optional Ingredients
- Sugar to increase alcohol content – Any sugar added prior to fermentation is converted into alcohol during fermentation, creating a higher alcohol content of the final product. Common types of sugar used are frozen apple juice concentrate, honey, brown sugar, and dextrose.
- Sugar for carbonation – One way to get carbonation is to add more sugar prior to bottling (more on this later). This is also referred to as ‘priming sugar’. You can use any type of sugar for this, but dextrose and frozen apple juice concentrate are favored by many cider makers.
- Sugar substitute – A common way to make a sweet hard cider is to use a sweetening agent that won’t be consumed by the yeast (called non-fermentables). The most commonly used hard cider sweeteners are sugar alcohols, natural sweeteners, and artificial sweeteners.
Advanced Ingredients
- Pectin Enzyme (liquid or powder) to reduce the haze.
- Acids (malic, tartaric, tannic, or blend) to increase the overall flavor profile by reducing the pH.
- Wine Tannins/Tannic Acid to add ‘body’ to the hard cider.
- Yeast Nutrient or Yeast Energizer to give the yeast the proper nutrients to carry out fermentation.
3. Gather and Prepare Equipment
 As is the case with ingredients, the specific equipment you need will vary according to the recipe and techniques you are using (you can find more information on the equipment page or the kits page). The size of the batch and techniques used play direct roles in which supplies you need for a given batch.
Required Equipment
- Sanitizing solution – You’ll use this to ensure that all equipment is free of unseen bacteria (I recommend Star San).
- Fermentation containers – You use these to hold the cider while it’s undergoing the fermentation process. Some of the most commonly used containers for fermentation are:
- Carboy – Also called demijohns or fermenters, carboys are plastic or glass containers specifically made for fermenting alcohol. The most common sizes are 1-gallon, and 5-gallon.
- Plastic bucket – Food-grade buckets called ‘fermenting buckets’ or ‘bottling buckets’ are used for fermentation.
- Container store-bought cider came in – If the cider or juice you buy from the store comes in a glass bottle, you can use it as a fermentation container.
- Rubber stopper and air lock – You place these on top of the fermentation container in order to allow gas to escape, while keeping air and contaminants out.
- Bottles and caps – Either standard beer bottles, growlers, or hinge-top bottles. You can reuse bottles from beer, cider, etc, so long as it is not the twist off style, and has been thoroughly cleaned and sanitized.
- Bottle Capper – If you plan on using standard beer bottles and attaching single-use caps, you will need a bottle capper. This device attaches the bottle cap onto the bottle. See Section 9: Bottling for more information.
Optional Equipment
- Cleaning solution – You can use standard cleaning methods and tools such as dish washing soap and sponges, however, there are specialized cleaners available as well.
- Brushes – Brushes are very helpful when cleaning your equipment.
- Hydrometer and test jar – A hydrometer measures how much sugar is in the cider and is important at different times when making hard cider. An initial test indicates the total possible alcohol content of the final product, testing throughout the process gives updates on progress on fermentation, and testing at the end determines that fermentation is complete and final alcohol content. This video from NorthernBrewer gives a great overview of using a hydrometer. It focuses on brewing beer, but it’s very applicable to cider.
- Funnel – A funnel is very handy for moving cider between containers.
- Auto-siphon (or racking cane) and food-grade tubing – These are devices for moving cider between containers in a much more efficient way. See Section 6: Racking for more information.
- Bottle filler – A bottle filler makes moving cider into bottles much easier. It attaches to the end of the tubing (on the side opposite of the auto-siphon) and allows you to start and stop the flow of cider quickly, cleanly, and without losing the siphon. See Section 9: Bottling for more information.
Advanced Equipment
- pH strips and acid testing kit – These give you the information needed to make adjustments to the pH or acids in your cider.
4. Cleaning and Sanitizing
It’s very important to clean and sanitize anything that will touch the cider throughout the process of making homemade hard cider. This includes standard equipment such as the carboy, stopper, air lock, funnel, etc. But it also includes things you might not think about, like spoons, measuring cups, measuring spoons, etc.
You must clean and sanitize several times throughout the process, it’s not something that’s only done at the beginning.
When learning how to make hard cider, it’s important to note that cleaning and sanitizing are not the same thing.
Cleaning vs Sanitizing

Cleaning
Cleaning removes the contaminants you can see (dirt, grime, etc). Clean with standard washing techniques: hand washing or putting items in the dishwasher, using dish soaps, etc. Be careful not to scratch anything plastic as the scratches can harbor bacteria in future batches.
Sanitizing
Sanitizing is the process of removing the unseen contaminants, such as bacteria. Use a liquid or powder sanitizing solution (such as Star Sans) and follow the instructions on the package. Place all sanitized equipment on clean paper towels until ready to use.

5: Primary Fermentation
Now that you’ve gathered the supplies and sanitized the equipment, you are almost ready to and yeast and start fermenting.
Fermentation is the process of yeast converting the natural sugars in the cider into alcohol and carbon dioxide gas.
The amount of sugar in the cider directly relates to how much alcohol gets produced. If you want more alcohol in your hard cider than is produced using the sugar in the raw apple juice, you will need to add additional sugar prior to fermentation.
Pre-Fermenation Adjustments
This is the last chance to make any adjustments to the cider prior to fermentation. A couple things you may want to consider adding are:
- Sugar – The amount of sugar in the cider directly relates to how much alcohol gets produced. If you want more alcohol in your hard cider than is produced using the sugar in the raw apple juice, you will need to add additional sugar prior to fermentation. See ‘Decision Point’ below for more information.
- Fruit – Some recipes may call for adding fruit (whole, chunks, puree, etc) to primary fermentation.
- Acid – Some apple ciders will not have adequate acid levels. Adding malic acid or an acid blend can supply some extra acid.
- Tannin – Again, many ciders don’t have enough tannin, and you can add additional tannin prior to fermentation.
Decision Point: How much sugar to add prior to fermentation?
If you don’t add any sugar to the cider, it will yield hard cider that is approximately 6.0 – 6.5% ABV, which is already a bit higher than most store-bought hard cider. If you want to increase the alcohol content, you will need to add sugar prior to fermentation.
A very common choice of sugar to add to homemade hard cider is frozen apple juice concentrate (after thawing it in the refrigerator, on the counter, or in the microwave, depending on how much forethought you have).
You will increase the outcome by .5% ABV for every half cup of concentrate you add per gallon. For a 1-gallon batch, adding a full container of concentrate (1.5 cups) will produce a batch at 7.5% – 8.0% ABV, which is the highest I would recommend. A higher alcohol content can reduce the apple taste in the final product (even when using apple juice concentrate as the sugar). I would recommend not adding any sugar if you are a beginner.
When using a hydrometer, you don’t have to guess (or trust me)! You will use your hydrometer to measure and adjust the sugar content in the cider, thereby controlling the alcohol content in the finished product. First, measure the specific gravity of the raw cider by pouring (or siphoning) some into your test jar (if you are using a combination of juices or ciders, pour them all in your fermentation container, stir/shake them up, and siphon some into the test jar). It’s likely your reading will be around 1.048 – 1.052 (6.0 – 6.5% ABV). If you don’t add any sugar to the cider, this will be the final alcohol content after primary fermentation is complete.
If you want to increase the alcohol content, you will need to add sugar prior to fermentation as described above.
You will want to recheck the cider with the hydrometer after you add the sugar. To do this, just add the concentrate to the juice, stir/shake it up, and retest.
Final Note: Write down the starting specific gravity! It will seem easy to remember… it is not. You will forget (it’ll be ~2 months until you drink it). Knowing the starting specific gravity is vital to knowing the actual final alcohol content.
Measure Original Gravity
If you are interested in knowing the alcohol content in the hard cider you are making (as most are), you will need to measure the starting gravity (also called original gravity or O.G.).
The most common approach is the use a hydrometer. A hydrometer measures the sugar in the cider. Make a note of this number, as you’ll use it in the end to calculate ABV.
There is some variation, but a starting gravity between 1.040 and 1.060 is a reasonable starting point.
Pitch the Yeast
You have your apple juice in the primary fermentation container, with any sugar you added. The next step in making your own cider is to add the yeast (called ‘pitching’ in brew-speak). Simply add the appropriate amount of yeast directly into the carboy.
The instructions on the packet of yeast will likely tell you to add the yeast to lukewarm water prior to pitching (a process called ‘rehydrating the yeast’). The intent is to get the yeast ready for fermentation and prevent the yeast from having a negative reaction to being put directly into sugar (sugar shock). Personally, I don’t ever rehydrate the yeast as I have found it causes a bigger headache (more equipment to sanitize, using thermometer on small amount of water, waiting) than it’s worth.
The yeast packet will likely contain enough yeast for a 5-gallon batch, so use the whole packet if you are making a 5-gallon batch. If you are making a smaller amount, use only a portion of the packet. Using more yeast won’t cause problems unless you use tremendously too much (multiple packets).
Finally, attach the stopper and airlock. Start by adding sanitizing solution to the airlock up to the max line indicated. Then put the airlock into the rubber stopper. Lastly, put the rubber stopper into the opening on the lid (if you are using a bucket) or carboy opening. Make sure there isn’t any liquid on the stopper or the carboy to get a good seal).
A look into the fermentation process:
Fermentation is all about creating the alcohol and carbon dioxide from the yeast interacting with the sugars.
- Alcohol: Ahh… what makes the Hard Cider ‘Hard’! When you add yeast to the cider, it starts to ‘eat’ the sugar in the cider. One of the byproducts is alcohol. More sugar in the raw cider means more alcohol in the hard cider.
- Carbon Dioxide (CO2): While carbon dioxide is a distant second in terms of fermentation byproducts (alcohol being the first), it does provide a few benefits. First, it gives the satisfying look and sound of tiny bubbles in the cider during fermentation, making their way to the top of the liquid, ending in a satisfying ‘glug’ sound as it escapes the air lock. Second, it gives a visual indication of the process of fermentation (since the formation of alcohol can’t be seen). Lastly, it creates carbonation during the bottling process and in the finished product. During primary fermentation, you will let the carbon dioxide escape through the air lock.
Two factors to keep in mind during primary fermentation are:
- Temperature: Different yeasts will have different acceptable temperature ranges listed in their instructions. If you are patient, stay on the lower end of that range. During the fermentation process, the colder the temperature of the cider, the slower the fermentation (which is good for flavor). If you aren’t patient, aim for the high side. Since the cider will take on the temperature of its surroundings, controlling the temperature of the cider is as simple as putting it in a location with the appropriate temperature.
- Light: Some say that direct sunlight can negatively affect the cider, and others disagree. You can either read up on the science and come to your own conclusion or be like me and keep it out of direct sunlight just to be safe.
And Now We Wait
Place the container in a room temperature environment (or closer to 60 degrees if you can) and wait for the magic to start. Within a few hours or days, you should start seeing and hearing CO2 gas escaping through the air lock. You may also notice a very distinct smell (sulfur).
Patience is a key ingredient when learning how to make hard cider. Fermentation will take about 1-2 weeks. You’ll know when it’s done when it’s been several days since you’ve seen bubbles escape the airlock.
In the first half of fermentation, you can shake and swirl the bucket to help release the gas. In the last half, move the bucket onto a table or counter if you can (to prepare for racking), and don’t move or bump the container to let all the sediment settle to the bottom.
6. Racking
Primary fermentation results in a buildup of sediment at the bottom of the container called ‘lees‘. At some point, you will need to separate the cider from the lees. It’s important to keep the container very still to allow the lees to fall to the bottom and stay there.
This process is called racking, which is simply transferring the cider from one container to another, while attempting to leave less behind and limit oxygen exposure. Racking is also done in bottling.
There are a variety of ways you can rack the hard cider. I will cover the 2 most common ways here, and a much more comprehensive guide can be found here.
How to Rack by Hand

Pour by hand
For small batches, you can simply pour the cider from one container to another. In almost all cases, it is wise to use a funnel in order to prevent spilling. When pouring by hand, it can be very hard to keep all the lees from coming with the cider.
How to Rack Using a Siphon
Using a siphon is the preferred approach when making homemade hard cider, as it’s easier and cleaner to transferring by hand.
Siphoning is the process of using gravity to move liquid between containers. A siphon is created when 2 sources of liquid of different heights are connected with a tube.
To initiate the siphon, liquid must be forced into the tube (called priming the siphon). Once initiated, the hard cider will flow from the higher container to the lower container without any ongoing force applied. In homebrewing, there are several ways you can prime the siphon

Siphon with an Auto-Siphon
An auto-siphon is a long rigid tube that is designed to extend down into the bottom of a fermentation container, then has a sharp bend just outside the container.
It has a manual pump built into it allowing you to quickly and easily get liquid into the tubing to start the siphon. I strongly recommend getting an auto-siphon.
For more techniques on priming a siphon, or more detailed information, read the complete racking guide:
7. Secondary Fermentation
Unlike primary fermentation, secondary fermentation is not about yeast activity. Secondary fermentation is about improving the taste by letting the cider age. During the aging process, the flavors condition and mellow.
Hard cider is more like wine than beer; it will benefit from aging in secondary fermentation and after bottling. After 2-3 additional weeks, check the hard cider with a hydrometer. If the specific gravity is between, .998 and 1.004, you are ready to bottle.
Secondary fermentation is also where various flavorings can be added. Some of the most common of these are fruits such as blueberries or peaches (see the recipe page or this article for much more about fruit additions). Cinnamon sticks are also a very common additions, but be very careful not to add too much. Start by adding a few and tasting after a week or 2, then adjust from there.
8. Finishing Adjustments
 The three most common adjustments are to increase flavor, carbonation, and sweetness. With no adjustments, many find the hard cider to be slightly bland, having no carbonation (still), and not sweet enough. Of course, if you don’t find any problems with the hard cider, you don’t need to make any adjustments at all.
Flavor Adjustments
It’s a common complaint among cider makers that the final hard cider doesn’t taste strongly enough like apples (or whatever the desired flavor profile is). Using low quality juice and fermenting at higher temperatures seem to enhance this problems. You can overcome this challenge very easily by using artificial flavorings, like this artificial apple flavoring. It’s potent stuff, so be careful and add it a little at a time, tasting often.
Carbonation Adjustments
Unless you like your hard cider completely still (without any carbonation), it’s likely you’ll want to add carbonation. There are a couple ways to do this:
Bottle Conditioning:
To create carbonation, you will add more sugar. The residual yeast will eat this new sugar (called ‘priming sugar’), and create more alcohol and CO2 gas.
This time, instead of the gas escaping the container through an airlock, it is trapped inside the bottle and carbonate the beverage. Since this gas is trapped in a glass container, it is very, very important to add the right amount of sugar, as adding too much will make the glass explode under high pressure.
A common rule of thumb for priming sugar is to use 1 ounce per gallon (which is just under 30 grams of sugar per gallon).
Force Carbonation:
You can use a keg to force carbon dioxide into the hard cider.
Sweetness Adjustments
Feel free to give the cider a taste. At this point, the sweetness isn’t going to change, so if you think it’s not sweet enough (too dry) you need to fix it now.
Again, there are a few ways to add sweetness to the hard cider, but the easiest is to use a sugar substitute. See the page on hard cider sugar substitutes for more information. A standard amount (and good baseline to use) is to add the equivalent to 1 cup of sugar sweetness for a 5-gallon batch.
Using any form of real sugar will just restart the fermentation process and could add dangerous amount of pressure to the bottles.
9. Bottling
Unless you plan on drinking the cider immediately after fermentation, you will need to transfer it to bottles.
Sanitizing
You will need to sanitize all the equipment you are using in this step, including the bottles, funnel, and anything you might use to scoop or measure sugars or sweeteners.
Bottling
You will bottle your hard cider using the auto-siphon, tubing, and bottle filler. Start the siphon and fill each bottle by pressing the spring-loaded bottle filler into the bottom of the bottle.
You don’t have to use a bottle filler, but it could be complicated or messy to move from one bottle to the next.
After you finish several bottles, place a cap loosely on them and let it sit as you continue filling. The goal is for the CO2 gas to fill the head-space (and not air). Then crimp on the cap with a bottle capper.
Aging
Hard cider is more like wine than it is like beer, and can benefit from aging. Some cider makers age their ciders for a year or more. The 2 most common ways to age cider is:
- Extended secondary fermentation
- Extended time after bottling
10. Drinking
 You are well on your way to learning how to make hard cider, but there is one last step: Drinking! While drinking may need no explanation, tasting may. A big part of making cider is learning to taste specific characteristics to make adjustments in future batches. In particular, some things to note are:
- Appearance
- Smell
- Amount of carbonation
- Sweetness
- How prominent the taste of alcohol
- Finish/aftertaste